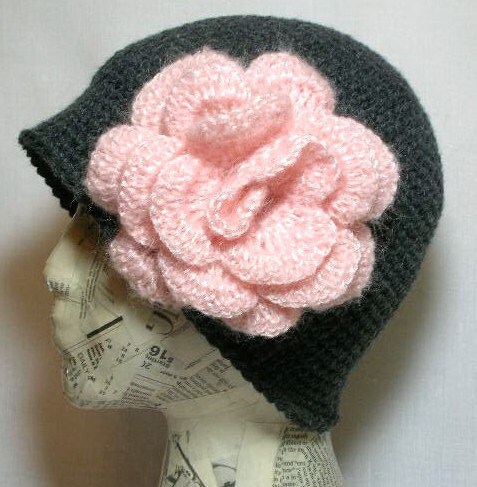
I have been in a hat/cap/beanie making mood lately. I have no idea why since I live in Texas and it is the rare day that Texans need to keep their heads warm. But in any case, here's my 'make your own custom cloche' instructions no matter the head size or the yarn/hook combo. Works for little girls, works for big girls.
First you need to measure the circumference of the head in question. For most adults you can figure 21" if you don't want to go to the trouble of digging out the tape measure. Now we all remember that the circumference of a circle equals 2 times pi times the radius. (Where the heck is the pi symbol on this keyboard?) Moving everything around through the magic of algebra we have
diameter = circumference/3.14
The diameter is the important number here. In our example of the circumference being 21", we have a diameter of approximately 6.7". Now you crochet in the round in a continuous spiral, starting with 6 SC in the first round and increasing by 6 each time around. In other words:
ROUND 1: CH 2. SC 6 in the second chain from the hook.
ROUND 2: (2 SC in the next stitch) all the way around for a total of 12
ROUND 3: (SC 1, 2SC in the next stitch) all the way around for a total of 18
ROUND 4: (SC 2, 2SC in the next stitch) all the way around for a total of 24
ROUND 5: (SC 3, 2SC in the next stitch) all the way around for a total of 30
.... and so on....
until the diameter is close to what you calculated (6.7" in our example.) Doesn't have to be exact, just close. Now for the easy part. However many rounds you have made so far, make twice that many without increasing (one SC in each stitch from now on.) If you had 8 rounds now add an additional 16. Finish off and weave in loose ends.
In summary:
1. figure out the diameter you need (circumference of the head divided by 3.14.)
2. crochet in the round in a spiral increasing by 6 each round til you reach that diameter.
3. Now do twice as many rounds as you have already done, but only do 1 SC in each stitch.
4. Finish off and weave in loose ends.
And if you want it to be a beanie, just do fewer rounds at the end.
Thanks so much for this tutorial/hint. I've never had a problem with the increasing, but couldn't figure out how to size the diameter (except thru trial and lots of error). Your way is so logical!
ReplyDeleteNow I'm off to crochet a hat - for my daughter who loves them. I'm in the Ft. Worth area and it definitely doesn't get cold enough here!
Also, I plan to link back to this from my blog/twitter, if that's OK.
~Sarah
You're very welcome, Sarah, and thanks! I would love a link back to my modest blog. :)
ReplyDelete