Friday, November 27, 2009

Speaking of crocheted hats...


I made this hat using the instructions in my previous post for a friend who saw a similar knitted one she liked. I used two strands of yarn crocheted together - a bulky weight pink yarn and a white eyelash yarn. A second friend saw the hat when my husband passed it off to the first friend and asked for one in red for her mom. Since I was on a roll (and have quite the eyelash yarn stash), I worked on a white on white one during the long Thanksgiving drive to Dallas which promptly ended up on the head of my teenaged niece. Several other family members noticed it during the holiday feast and requested hats in various colors. I am quite surprised - but pleased! - at its reception. What with two strands of yarn and a large (size K or more) hook, this thing works up surprisingly fast - 3 hours max. So if you need to make a last minute Christmas gift, may I suggest....

Thursday, November 12, 2009

No Gauge Custom Cloche


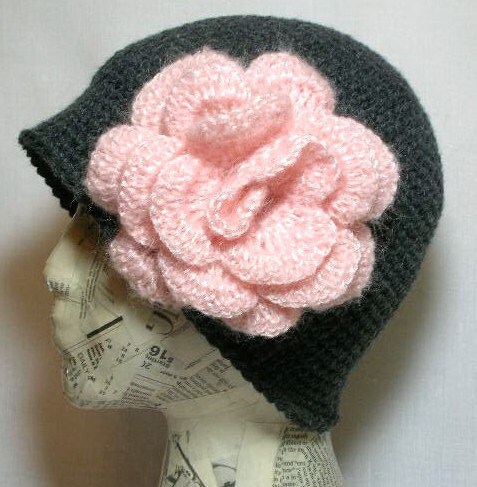
I have been in a hat/cap/beanie making mood lately. I have no idea why since I live in Texas and it is the rare day that Texans need to keep their heads warm. But in any case, here's my 'make your own custom cloche' instructions no matter the head size or the yarn/hook combo. Works for little girls, works for big girls.

First you need to measure the circumference of the head in question. For most adults you can figure 21" if you don't want to go to the trouble of digging out the tape measure. Now we all remember that the circumference of a circle equals 2 times pi times the radius. (Where the heck is the pi symbol on this keyboard?) Moving everything around through the magic of algebra we have

diameter = circumference/3.14

The diameter is the important number here. In our example of the circumference being 21", we have a diameter of approximately 6.7". Now you crochet in the round in a continuous spiral, starting with 6 SC in the first round and increasing by 6 each time around. In other words:

ROUND 1: CH 2. SC 6 in the second chain from the hook.
ROUND 2: (2 SC in the next stitch) all the way around for a total of 12
ROUND 3: (SC 1, 2SC in the next stitch) all the way around for a total of 18
ROUND 4: (SC 2, 2SC in the next stitch) all the way around for a total of 24
ROUND 5: (SC 3, 2SC in the next stitch) all the way around for a total of 30
.... and so on....

until the diameter is close to what you calculated (6.7" in our example.) Doesn't have to be exact, just close. Now for the easy part. However many rounds you have made so far, make twice that many without increasing (one SC in each stitch from now on.) If you had 8 rounds now add an additional 16. Finish off and weave in loose ends.

In summary:
1. figure out the diameter you need (circumference of the head divided by 3.14.)
2. crochet in the round in a spiral increasing by 6 each round til you reach that diameter.
3. Now do twice as many rounds as you have already done, but only do 1 SC in each stitch.
4. Finish off and weave in loose ends.

And if you want it to be a beanie, just do fewer rounds at the end.

Saturday, November 7, 2009

Groovy Crochet Vest


I scored some great 70s craft magazines at a thrift sale recently. Ah, the styles of my youth. I remember wearing vests similar to this, although growing up in Texas we were never fashion forward enough to wear them this long. Wonder what my teenage niece will say about it?

Thursday, October 29, 2009

The Magic (Yarn) Ball


My friend Leslie over at Wool Mountain Studio told me about 'the magic ball' the other day. How have I not heard of it before? You take your leftover yarn odds and ends and tie them end to end to make one long ball. Voila! You've found a use for all those short lengths of yarn and created a 'magic' yarn that is full of surprises. I'm crocheting this hat with a magic ball made from a big tangled glob of leftover wool needlepoint yarn. I must admit it IS fun watching the colors change as I go along. And in case you are wondering, I haven't crocheted in the loose ends on purposes. I kind of like the way it looks - it fits the whimsical nature of the Magic Ball, don't you think?

Saturday, October 24, 2009

Easy Crocheted Hooded Cowl


Our first cold snap put me in the mood to create something warm. This cowl will keep your neck warm. Or pull it up over your head like a hood to keep your head and ears warm. Or pull it down over your shoulders to keep them warm. Or do all three.

Pattern available in my etsy shop.

Monday, October 5, 2009

Ready for the Renaissance Faire


This Juliet cap was specially requested by a friend. It takes less that 100 yards of yarn, can be easily finished up in a hour or two, and it's absolutely perfect for the Texas Renaissance Festival! If you've never been, I strongly encourage you to go - and wear your walking shoes.

Pattern available in my etsy shop.

Saturday, August 22, 2009

Double, Double Boil and Trouble

DH pointed out that I haven't posted to my blog in a LONG time. The killer Texas heat has definitely been a huge factor in slowing me down. Combine that with malware that brought my PC to its knees (I'm still trying to recover - I am currently using my son's borrowed PC) and I'm surprised I even get up in the morning. Not really, but it feels good to complain.

I have tried one new thing - I finally dyed some old vintage white hobnail bedspread fabric using Rit dye. I wasn't brave enough to dye it in the washing machine so I used a pot on the stove. Very easy after all! And the end result is a much more interesting color than white. Now to figure out what to do with it. Suggestions, anyone?

Monday, July 13, 2009

How to buy a bread machine for $10 or less


The short answer: Goodwill. I've noticed that Goodwill stores are a great place to find expensive appliances (like bread machines) for a few bucks. The trick is knowing that Goodwill lines them up along a back wall in the least interesting part of the store. My eyes used to just bounce off of them like some high-tech reflective surface. When I seriously started looking for a bread machine a few months ago I finally noticed them. Now I know what electrical treasures lay buried in the nether regions of the local thrift store.

For example, this morning I saw two juicers, three bread machines, a deep fryer, and several other appliances I couldn't even identify. For $10 I picked up this bread machine, brought it home, cleaned it, found the instruction manual online, printed the manual, and then made a loaf to be certain it works. My husband was convinced that something must be wrong with it, that it wasn't going to work, that no one would drop off a working bread machine at Goodwill. I, of course, knew better. Because I understand how those appliances get to Goodwill in the first place. One gets a fancy new gadget, uses it a few times, gets bored with it and finds somewhere to store it. Later (could be months or years) one gets rid of it while in a frenzy of de-cluttering.

By the way, this bread machine is headed for a friend who needs one - it's pictured loaded up in my car ready for delivery. I was tempted to pick up one of the juicers, too, but I already have one in storage that hasn't yet been de-cluttered.

Saturday, July 11, 2009

Oxymoron of the Day: Kosher Creole


Can this be? Can shellfish-rich creole food be kosher? Can Nawlins Jazz and Jewish Klezmer make beautiful music together? What do YOU think?

Second Liners Jambalaya
  • 1 1 lb jar gefilte fish, drained
  • 2 C cooked rice
  • 2 T butter or pareve margarine
  • 1/4 C chopped green pepper
  • 1/2 C chopped onion
  • 1/2 tsp salt
  • 1/8 tsp pepper
  • 1/4 tsp thyme
  • 1 10.5 oz can condensed tomato soup, undiluted
  • 1 C milk
  • paprika

Saute onion and green pepper in butter until tender but not brown. Add salt, pepper, thyme, soup, and milk. Mix with rice. Pour into greased 1 1/2 qt baking dish. Arrange fish on top. Press into rice mixture and sprinkle with paprika. Bake in a 350 degree oven for 30 minutes.

Tuesday, June 23, 2009

The Chard that wouldn't die...


Swiss Chard, that is. If we ever experience another Great Depression, my family won't have to worry about having greens on the table. My one plant has been going strong for right at a year now and shows no signs of slowing down. If you have any interesting chard recipes, please let me know. My latest find is this 'greens soup' which is actually quite tasty:

  • large bunch of mustard, kale, chard or spinach; chopped

  • bunch of cilantro, arugula or parsley; chopped

  • 4 leeks, sliced and rinsed

  • juice of 1 lemon

  • chicken stock

  • 2 cloves garlic, minced

  • 1 tsp brown sugar

  • 1 tsp salt


  1. Sautee leeks in olive oil with a few bay leaves and minced garlic

  2. Add brown sugar and salt. Cook for a few more minutes.

  3. Throw in greens. Cover with stock.

  4. Simmer 30 minutes.

  5. Stir in herbs and lemon juice.


Sunday, June 7, 2009

Rites of Passage


Today was B's first time to help mow the lawn. And at his suggestion.

Tuesday, May 26, 2009

Bean TeePee Update


The bean plants are growing and have pretty little white flowers. Quite a difference from my previous TeePee post. Hopefully the beans themselves will be not be too far behind. DH asked recently if the beans I planted were 'french cut beans.' I am only slightly more plant savvy, so white flowers (rather than brown leaves and vines) are a very promising sign.

Saturday, May 2, 2009

Roses and Vines


Summer is just around the corner. Roses blooming all around me inspire this new lariat design.

Pattern available in my etsy shop.

Tuesday, April 28, 2009

How to Make your Swiffer Green


I have a Swiffer and I like it. But I keep forgetting to buy those sheets for them. And since I am a bit of a tightwad, I resent having to buy them in the first place. They seem expensive, don't you think? Anyway, a crocheted swiffer sock pattern over at Craftstylish looked like a cheap (and green) solution - a reuseable cover that can go in the washing machine. The next thing that popped into my head was those 50's crocheted dusting mitts with the loops. I'm a sucker for everything mid-century modern so I had to have one with loops. Add research on the loop stitch and ugly old acrylic yarn and I've got my loopy duster. And I bet synthetic yarn is better at creating static electricity than the fancy stuff anyway.

Monday, April 27, 2009

How to Cook Greens


My gracious and generous neighbor, Redneck Mother, dropped off a mess of Swiss Chard from her garden the other day and I wasted no time in cooking it up. A few years spent in Mississippi taught me to truly appreciate plants with huge dark green leaves. Although they may look a little daunting (I have seen my MIL refuse to cook them up because they are 'too much trouble to wash') , they don't have to be labor intensive. Here's my shortcut, good for greens of all persuasion:
  1. Put the greens in your kitchen sink and fill it up with cold water from the tap. Let sit for about 30 minutes. Any grit left on the leaves will have sunk to the bottom of the sink.

  2. Take the greens from the sink and set them aside. Don't worry about drying them off - a good shake to get most of the water off is sufficient. The water that still clings to them will be used to cook them in a minute. Chop them roughly. (I like to include the big stems but some people prefer to cut them out.)

  3. Heat a big skillet. Add a tablespoon or so of olive oil and a minced clove or two of garlic. Saute the garlic for a minute.

  4. Add the chopped greens. Cook, tossing occasionally, for about 2-3 minutes. You want them wilted but not mushy. (See? The water still clinging to the greens steams and cooks them!) And don't worry about an overly full skillet - these babies shrink up a lot.

  5. Put them on a plate and add a little salt and pepper. If you're from Mississippi, you'll have a bottle of pepper sauce handy. If not, a splash of balsamic vinegar is nice, too.

Friday, April 24, 2009

Oreo cookies that never get stale


I had some leftover black and white yarn from an amigurumi class that just finished up. Guess what I couldn't get out of my mind? For each cookie, make two black and 1 white of the following:
  • CH 2. Work 6 SC in the second CH from the hook.

  • Make 2 SC in each of the 6 stitches (12 SC total.)

  • (SC 1, make 2 SC in the next stitch) all the way around (18 SC total.)

  • (SC for 2, make 2 SC in the next stitch) all the way around (24 SC total.)

  • SL ST to the next SC and finish off. Weave in loose ends.

Use a tapestry needle and a length of the black yarn to sew together the three pieces with a running stitch. Now I'm off to the store to compare them to the real thing...

Thursday, April 23, 2009

This lovely poem posted recently by a dear friend reminds me that both Spring and Life are fleeting and for that reason should be savored all the more.


Baby Seed Song by Edith Nesbit, 1858-1924

Little brown brother, oh! little brown brother,
Are you awake in the dark?
Here we lie cosily, close to each other:
Hark to the song of the lark
"Waken!" the lark says, "waken and dress you;
Put on your green coats and gay,
Blue sky will shine on you, sunshine caress you
Waken! 'tis morning 'tis May!"
Little brown brother, oh! little brown brother,
What kind of a flower will you be?
I'll be a poppy all white, like my mother;
Do be a poppy like me.
What! You're a sunflower! How I shall miss you
When you're grown golden and high! But I shall send all the bees up to kiss you;
Little brown brother, good-bye.

Wednesday, April 22, 2009

Recycled Windowsill Garden


Here's my entry for the Crafty by Nature Contest over at Craftstylish.com. It's easy and simple. It's not horribly impressive, but did I mention that it's easy and simple? You'll need:

* empty tin cans, rinsed out
* old wool sweater(s)
* bedding plants (or seeds) and a little soil
* a pair of scissors


Toss the sweater(s) into the washing machine using hot water and the highest agitation setting. Since they are wool they will shrink and felt up. Then toss them in the dryer or let air dry. Cut tubes from the arms the same length as the cans. Pot the plants/seeds in the cans. (And probably you should nail a hole or two on the bottom for drainage, although I didn't.) Slip the sweater tube over the can. Instant windowsill garden (or pencil holder or vase if you don't like getting your hands dirty.)

BTW, you have until midnight tonight to enter the contest - let me know if you do!

Wednesday, April 15, 2009

Strawberries take a little patience.


I planted strawberry plants last fall. And being the total gardening noob that I am, I thought that the few strawberries I 'harvested' (did I actually 'harvest'? and can you call a handful a 'crop'?) was it for those plants. Not so. I guess they take the winter to get established because now I have big healthy plants, quite a few flowers and the beginnings of a REAL crop. The Kid even got a little into it and sampled the first one. Getting him involved is the most important harvest of all.

Friday, April 10, 2009

Felt Nest with Robin Eggs


This little nest with robins eggs measures about 3 inches across. I sewed on a pinback so I can wear it. Can these count as Easter Eggs?

Sunday, April 5, 2009

Embrace your Inner Grouch

[image: pocomedia.etsy.com]

"Meet Annie and Keith. They've been battling it out their whole lives - too bad mom forgot to keep score. They still love each other though, in a hate-hate sort of way. Black eyes, bruises, bite marks and unexpected haircuts are just a few ways of saying "I love you" to your sibling. Good thing they are related or it might be considered assault!"

Finally! Dolls that speak to my inner misanthrope! I've admired the twisted little dolls from Gravel Alley Primitives for quite some time. Reading their stories makes me laugh and reminds me not to take life so seriously - after all, no one gets out alive. I've leave you with another story for the road.

[image: pocomedia.etsy.com]

"She looks forward to the day when she can call you "hun" and make you wait 13 minutes while she changes her cash register tape. She'll giggle and say, "I'm new," even though she's not. She'll forget to scan your coupons and then make you stand in line at the customer service counter to get your discounts. She's mean like that. "

Saturday, April 4, 2009

Felt Easter Egg Tutorial


These felts eggs are easy to make and I'm pretty sure they are fun to play with.


You'll need:


  • craft felt (a 12" x 9" square will yield 6 eggs and cost about 25 cents at the local big box store)


  • polyfill for the stuffing


  • embroidery thread and an embroidery needle


  • three straight pins


  • sewing scissors


  • an egg template

For the template just trace an egg and then add 1/4" all the way around. You can also get find a free template here but you will need to reduce it to 75% the original size to get an egg that will fit in an egg case.


  • Cut out the egg shapes using the template. I fold the felt in half, pin the template to the felt and then cut two egg shapes at once. Two pieces will make one egg.


  • Whipstitch the two pieces together using the embroidery thread. I find that about a 30" length of embroidery thread is just about right length for me.


  • Leave about a 1" gap on the bottom of the egg for turning it inside out.


  • Turn the egg inside out.


  • Stick your finger in the egg and push out the seam all the way around.


  • Stuff with the polyfill nice and tight.


    Now whipstitch the bottom of the egg closed. Have fun!

Friday, April 3, 2009

Free Yarmulke Crochet Pattern for Passover


The Purl Bee has graciously posted the pattern for these crochet kippot . These skullcaps would be perfect gifts for Pesach, which starts next Thursday, April 9. These are so appealing they almost make me wish women also wore them.

Thursday, April 2, 2009

Sugar Free Peeps for Easter

[chiwaluv's Etsy Shop]

I found a crochet pattern for these adorable amigurumi peeps at
Chiwaluv Amigurumi Critters - perfect for Easter. Only 4 bucks for the pattern - about what you'd pay for real peeps plus your kids won't get cavities.

Sunday, March 29, 2009

The Kindness of Neighbors

That's a busted skylight if you can't quite tell what my photo is. We had quite a hailstorm a few days ago. Here's a pic of some of the pea, nickel and quarter size hail we got.

But this post is really about a very nice neighbor down the street. M is out of town on business so it was just The Kid and me. After staring at the broken skylight for most of the next day, it occurred to me that I probably ought to tape some plastic over it, especially since more rain was forcast. So I headed down the street to borrow an expanding ladder from a neighbor I thought might have one. He ended up doing all the work of getting up on the roof and taping down plastic. And then the next day he came over and swept all the leaves and broken tree limbs off the roof (and there was a LOT of green up there.) I'm so thankful for his kindness, which reminded me that no one can go it alone - we all need help once in awhile.

Saturday, March 28, 2009

Non-Euclidean Geometry meets Crochet


Ever heard of Hyperbolic Geometry? Apparently it is the geometric opposite of the sphere. On a sphere, the surface curves in on itself and is closed. On a hyperbolic plane the surface curves away from itself at every point. In other words....
In Euclidean geometry, as a circle gets larger, the length of the circumference increases linearly. But with a hyperbolic plane, we're talking EXPONENTIAL increases. Got that?
Oddly enough, the concept of a hyperbolic plane can be physically modeled using crochet.

Yes, you can impress your family and friends by making your own hyperbolic surface! All you do is increase the number of stitches in each successive row or round of a crochet project. That's it. Here's how to make a 'pseudosphere' (like the one I made pictured above):

1. CH 2. SC 6 in the second chain from the hook (6 SC total).
2. SC 2 in each stitch all the way around (12 SC total).
*BTW, I like to crochet in a spiral and not worry about ending rounds and starting another. So just keep going with step 3 - don't worry about making a SL ST to the last stitch in the round and all that stuff.
3. SC 2 in each stitch all the way around (24 SC total).
4. SC 2 in each stitch all the way around (48 SC total).
5. SC 2 in each stitch all the way around (96 SC total).
I think I stopped after step 5 but feel free to keep going!

You'll get a kinesthetic feel for what 'expanding exponentially' REALLY means. Early rounds go quickly, but each successive round takes longer and longer (and also eats up exponentially increasing amounts of yarn.)

If you want to learn a little more about the mathematics involved, check out this article or just google 'hyperbolic crochet.'

Tuesday, March 24, 2009

Felt Food - A Mixed Baby Greens Salad


Yum, yum. I wish I had thought of making this. What a great idea for kids AND grownups. So much more fun to play with than plastic food from the big box store, don't you think? I found this handmade felt salad at dashingBean's shop on Etsy. Her stuff is currently all sold out, but hopefully not for long. I'm hungry for more (sorry, couldn't resist...)

Monday, March 23, 2009

Free Felted Coasters Crochet Pattern


I saw something similar to this somewhere and thought it might be fun to make up a set. The coasters and their case make an easy project for the beginning crocheter - they work up fast and make an unusual gift. You'll need:
  • about 3 oz of 100% wool medium weight yarn. (Make sure it's wool - otherwise it won't felt.) I like Lion Wool Brand and Paton's Classic Wool. If you are using 2 colors like I did, a couple oz. of each color should be enough.
  • a size F or G crochet hook
  • a 28-30 oz can of vegetables (say, a 28 oz. can of tomatoes)
  • a zippered mesh laundry bag (like the kind you wash delicates in)
  • a tennis ball or a pair of jeans
You're going to do all the crocheting in a spiral rather than end each round and start a new one. I think working in spirals is SOOO much easier, plus it's going to be felted in the end anyway so who will know?


THE COASTER (Make 4 of these):

  1. Make a circle of 6 SC. You can do this one of two ways. You can CH 2 and then make 6 SC in the second CH from the hook. Or, you can use the 'Magic Adjustable Ring.' Check the video I have for this if you don't know what I'm talking about.
  2. Make 2 SC in each SC around (12 SC total.)
  3. (SC 1, 2 SC in the next stitch) all the way around (18 SC total.)
  4. (SC 2, 2 SC in the next stitch) all the way around (24 SC total.)
  5. (SC 3, 2 SC in the next stitch) all the way around (30 SC total.)
  6. (SC 4, 2 SC in the next stitch) all the way around (36 SC total.)
  7. (SC 5, 2 SC in the next stitch) all the way around (42 SC total.)
  8. (SC 6, 2 SC in the next stitch) all the way around (48 SC total.)
  9. SL ST to next stitch and finish off.

THE CASE:

  1. Repeat steps 1-8 of the coasters.
  2. (SC 7, 2 SC in the next stitch) all the way around (54 SC total.) If you want a two-toned holder, here is a good place to switch to your second color.
  3. SC in each stitch all the way around (54 SC total.)
  4. Repeat step 3 for 9 more times.
  5. SL ST to the next stitch and finish off.

FELTING:

Now you are ready to felt this stuff. Put everything in that mesh laundry bag and put it in your washing machine with that tennis ball or pair of jeans. The tennis ball (or jeans) will help agitate the wool and get it to felt up. Set the wash on the lowest water setting, the highest agitation setting and use hot water. Run it through a wash and rinse cycle. If the pieces aren't felted enough to your liking, you can wash 'em again. Trim any loose ends. Now to shape everything. It should be pretty easy to get the coasters flattened out - just stretch with your hands, if needed . As for the case, put it over the end of the vegetable can and tug it into shape. You make have to pull a bit on this one. It should look something like this (can you tell I live in Texas?):


Once you get it evened out, let everything just sit until it's dry. This could take up to 24 hours but overnight usually does it for me. That's it! Here's my set going for a test drive.

Let me know how yours turn out!

Saturday, March 21, 2009

Don't plant a Southern Magnolia


This is why.

I started picking up these seed pods this morning. The count is up to about 150 with no end in sight. And these things are about the size of a hand grenade. So you can't just mow over them. You have to pick. Them. Up. Not to mention the leaves, which are bigger and also (according to my husband) cannot be mowed over.

So. Think twice before you plant one of these things. But if you still want one, here's a very important tip: never trim up the branches. Leave the lower branches low (as in close to the ground.) That way this mess stays hidden.

Friday, March 20, 2009

Make a Bean TeePee


You know how people say that as a woman gets older, she gets more like her mother? Could be. I find myself more and more interested in things appropriate to a farmer or even a pioneer. And guess what my mom's nickname is? Pioneer Mom. As in the old pioneer days when you did everything yourself. I actually have a long way to go before meeting her high standard of self-sufficiency, but I'm working on it. I checked out The Urban Homestead: Your Guide to Self-sufficient Living in the Heart of the City (Process Self-reliance Series)
from the local library. I highly recommend it for those who really don't have a clue as to where to get started (and that would be me.) It's full of easy and inexpensive ways to dig in. Hence, my new pole bean teepee. I scrounged some bamboo poles from the garage and a large tree branch I had been meaning to throw away, lashed them togther with some of the t-shirt yarn mentioned in a previous post (didn't see that application coming) and instant teepee! Once I clear the grass and make a trip to the local nursery for beans I'm set.

Thursday, March 19, 2009

Everyone needs a pincushion, right?


I found a cute set of tiny (3" high) pottery mugs while junking and couldn't bear to leave them behind. So they sat on a shelf at home for a few weeks while I awaited inspiration. Sure enough, I came across a similar item made into a pincushion. Eureka! Funny how that works, isn't it? Here's one of the mugs in its new incarnation as a sunny holder of pins.

Wednesday, March 18, 2009

How to Make T-shirt Yarn


I looked at a lot of instructions and videos on the net and here is my take on how to make yarn from old t-shirts:

  1. The t-shirt must have no side seams, otherwise it's not going to work.
  2. Wash the t-shirt in hot water and dry on high to make sure it's shrunk as much as it is going to.
  3. Get out your ironing board. (no, not to iron the t-shirt.)
  4. Slide the t-shirt on the ironing board. This will make subsequent cutting much easier. (BTW, set up the ironing board opposite how you usually do it. If you are right-handed, point your ironing board to the right. If you are left-handed, point it to the left.)
  5. Cut off the bottom hem of the t-shirt.
  6. Cut along the bottom edge at an angle until you have about 1" in width. Then keep cutting in a spiral round and round, keeping the strip approximately 1" wide. This is where the ironing board makes it easier - just rotate the shirt around as you cut. And don't be OCD about getting it exactly 1" or exactly straight - just guesstimate. Or make it wider than 1" if you what. Your call.
You will eventually hit an obstacle - either the armpits or a print on the t-shirt. This is the end of your yarn-making adventure (at least with this t-shirt.) Let go. Cut it loose. Now, hold about a foot between your two hands and pull apart. The strip will naturally curl on the purl (or is it knit?) side. Whatever. It will curl on it's own if you pull it hard enough. Work your way down the strip pulling for the entire length.

Voila! You have t-shirt yarn! This bright green t-shirt was a size XL and I got about 32 yards from it. Now I just have to figure out what to do with it.

Monday, March 16, 2009

Eco friendly dryer sachets


Ok, ok. I was supposed to explain how to make t-shirt yarn this post. I'll do it tomorrow - I promise. But for now, look at these great eco-friendly dryer sachets filled with lavender from ReFabulous. I bought some of these a few months ago and LOVE them. We are a family of allergy sufferers, just like most families living in Central Texas, so I've always stayed away from the dryer sheets. But these are sooo wonderful! Lots and lots of creatively upcycled products in this shop. Go look!

Sunday, March 15, 2009

T-shirt Yarn Purse


Isn't this cute? I found it in Lifesanadventure's Etsy shop. She made it from old t-shirts that she cut up and knit together. I've noticed the t-shirt yarn for sale on Etsy and of course I immediately wanted to know how to make it. Turns out to be pretty easy. I'll explain next post...

Saturday, March 14, 2009

Curly Q


I saw a scarf somewhere that was filled with these spirals. I tried to make something similar but it just took too darn long (and used too much yarn.) So I went for a lariat instead. Still get the fun spirals but you can make it in an evening with much less yarn.

Pattern available in my etsy shop.

Friday, March 13, 2009

My New Favorite Crocheted Rose Pattern


I have been meaning to post this picture for awhile. Rarely do I find a crochet book that I really, really like. Well, I really, really like The Crochet Bible: The Complete Handbook for Creative Crochet
by Sue Whiting. These three roses were made from a pattern in the book and I love how they turned out. (That's the same pattern as the red rose in the upper right corner of the book's front cover.) I used a slightly larger yarn than called for so these came out about 5" across - hooray for big flowers! I tend to think of them as camellias rather than roses but who cares what you call them. There are a couple more projects in the book calling to me - always the sign of a good crochet book.

Thursday, March 5, 2009

The Slip Stitch

The slip stitch (abbreviated 'SL ST') is very easy. You will see it in lots of patterns, especially when you have to connect pieces or move along the edge without adding any height. Just slide the yarn under the next stitch, YO (yarn over) and then pull through the stitch and through the loop on the hook.

Monday, March 2, 2009

Help Baby Ike!


This is Isaac, nicknamed Ike-a-saurus by his big brother. Ike’s mama is the author of Haiku Mama and the amazing blogger behind Haikuoftheday, where you can read a lot of their story in her own words. Ike was born 13 weeks early and spent a lot of time in the NICU. Ike finally got to come home but then his dad got laid off and their insurance was cut off the same day.

Now baby Ike is back in the hospital and is very ill.

Many mamas from the Austinmama community are rallying together to organize fundraising events to help with mounting medical bills. You can help by donating at Ike's website. You can also help by going shopping! Some Etsy sellers have offered to donate proceeds from designated items to help Ike. Rachel Hobson, over at the AverageJaneCrafter blog, has all the info on the shops involved. Go check it out and see if you can find something you can't live without. And help baby Ike at the same time.

Thursday, February 26, 2009

What sport did you letter in?


While searching for treasure with my friend, I came across these chenille letters. I'm guessing (hoping?) I have it upside down, but it gives me any idea. Sewn on an appropriate sweater or jacket it will make the perfect 'gotcha' gift for a certain sister-in-law who should really read my blog more often.